Loaded Support Sphere Artifact — Where It Hides in Point Nemo
The first artifact you'll see in Point Nemo — a battered orbital sphere swirling in a purple debris cloud just past the entrance hatch.
▶ TL;DR
The Loaded Support Sphere is the first of three Point Nemo artifacts and sits about eight seconds into the descent, in the high chamber right past the entrance corridor. MrLeLedg's walkthrough catches the pickup at 1:15 and the whole exchange is wrapped before 1:21. Almost every player grabs this one by accident — the purple swirl around it is the most distinctive visual in Stage 4.
◇ Step-by-step pickup
Open Point Nemo from the destination wheel.
Stage 4 unlocks after Loch Ness, Huatulco, and Outer Banks are cleared. If the dock is greyed out, an earlier-world artifact or boat blueprint is still open — that has to be sorted before Point Nemo appears.
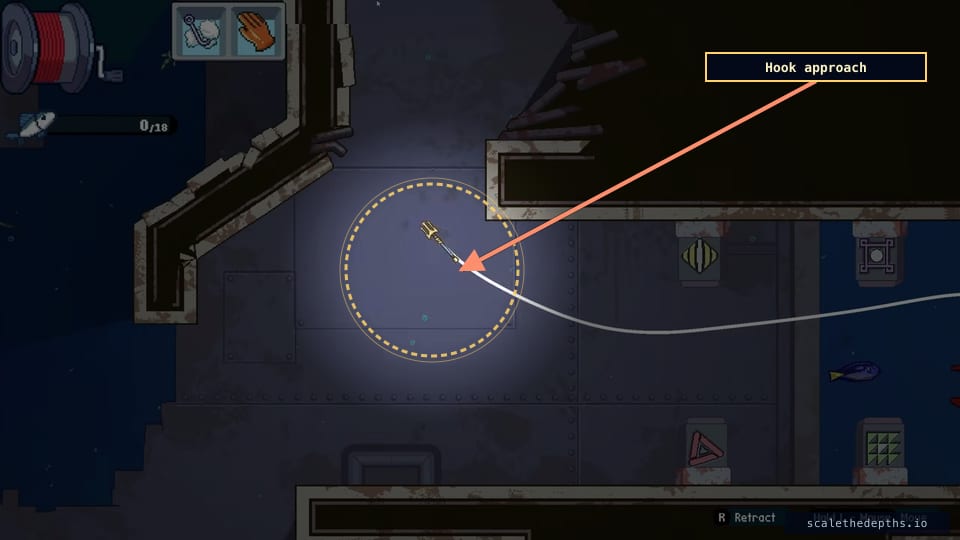
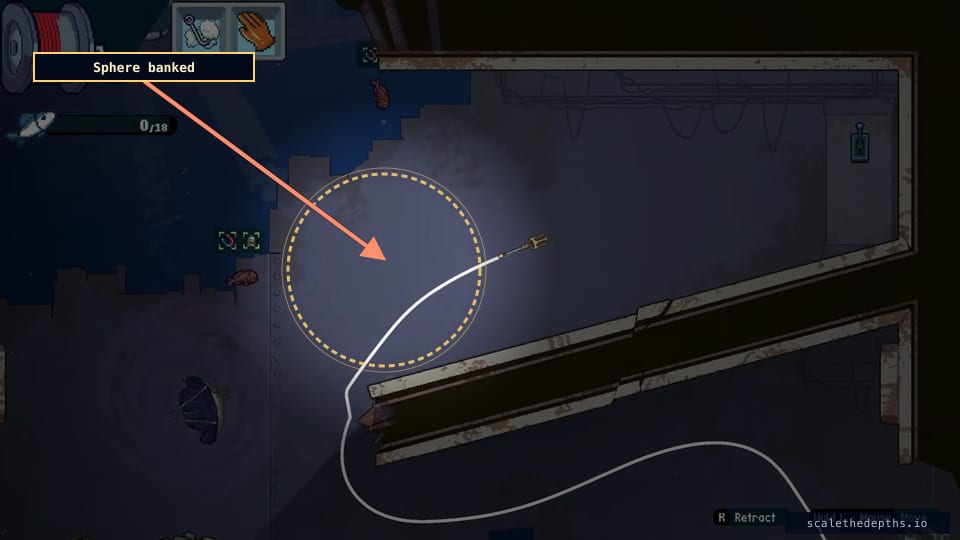
Cast directly down — no drift.
Unlike Huatulco or Outer Banks, Point Nemo funnels you down a single vertical column. Hold the line straight; the entrance corridor passes in roughly four seconds and opens into the first chamber.
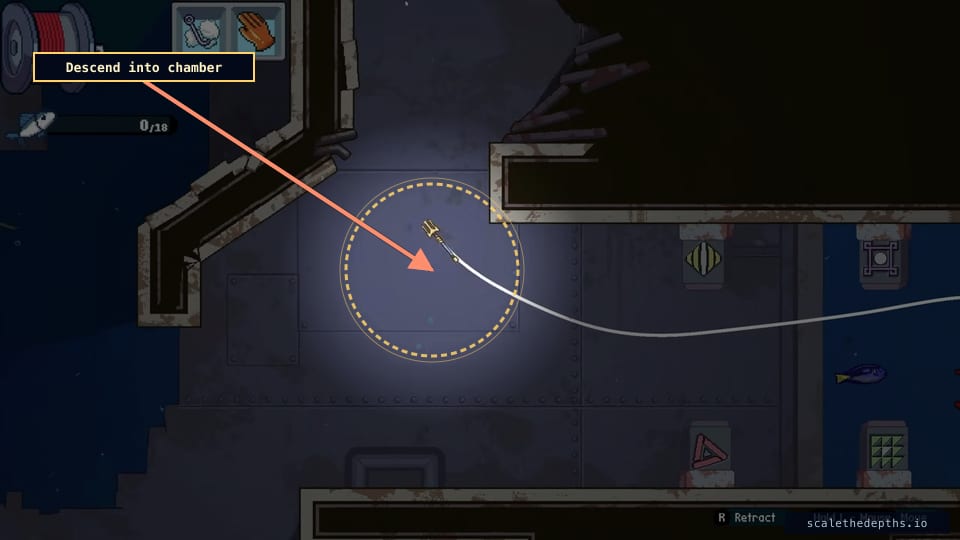
Identify the chamber by its landmarks.
Look for the blue and yellow shutter doors on the right wall and the cluster of dangling cables on the left. This is the same chamber every run — the Sphere alcove is on the left side, roughly a third of the way down the chamber.
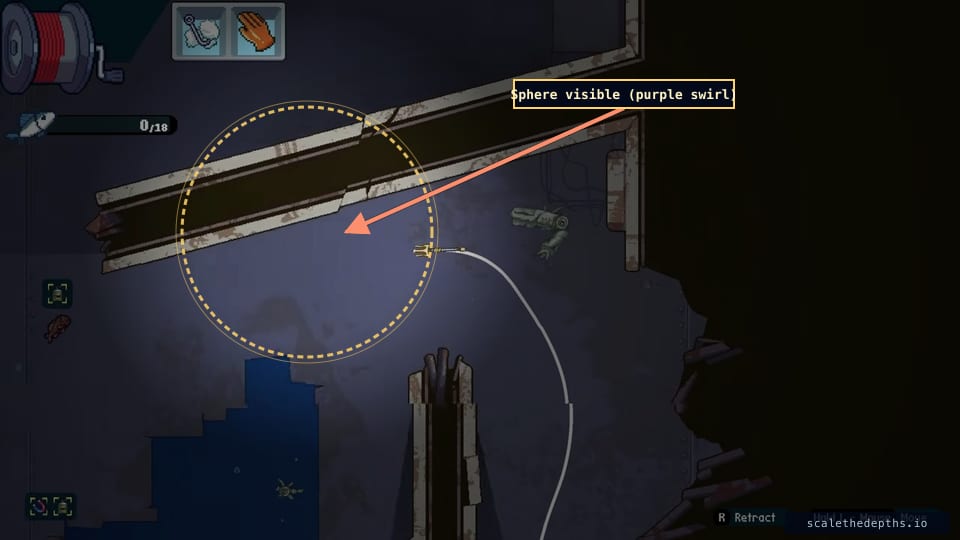
Watch for the purple swirl.
The Sphere is hidden inside a circular purple debris cloud that pulses slowly. It's the most visually distinct thing in the chamber — once you spot it, you do not need anything else to find the artifact.
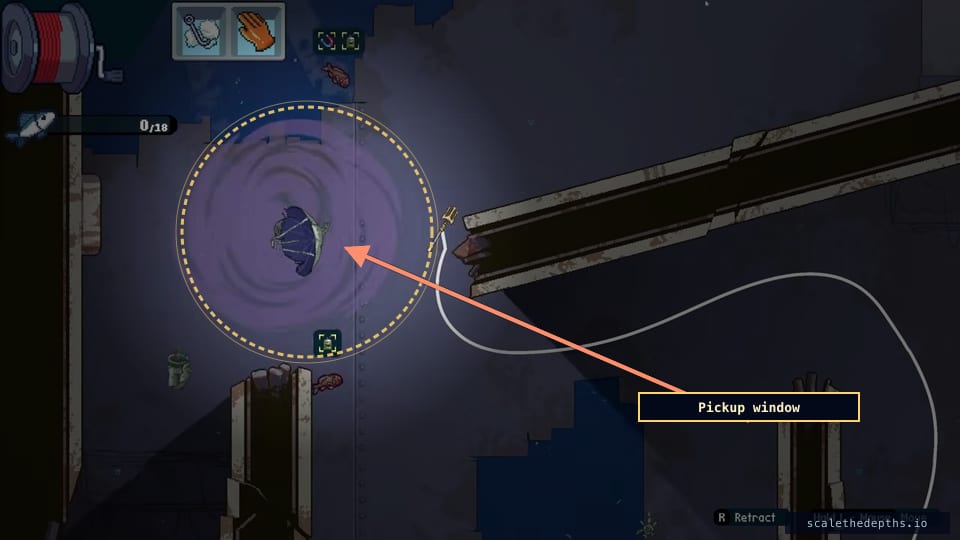
Drift the hook into the cloud.
Pickup geometry is generous here — you don't need to centre the hit, just touch any part of the swirl. The 'Artifact Discovered' banner fires and the cloud dissipates.
Keep descending — no retract yet.
Unlike most artifacts, you don't have to resurface to bank the Sphere. The game stores it immediately. Continue down toward the Submersible Controller chamber and onward to the Sextant.
◐ Walkthrough Keyframes
✦ Tips
- If this is your first Point Nemo run, grab the Sphere on the descent even if you've already decided to chase the Apophis legendary fish — the Sphere is on the way and the detour costs nothing.
- The purple swirl is the only purple in the chamber. If you don't see purple, you've drifted off the central corridor and need to nudge back.
- Pickup is generous — don't fight the hook trying to centre it. Touch the cloud anywhere and the artifact registers.
⚠ Warnings
- Do not confuse the Sphere with the dark cluster of cables on the left wall — both can look like a round shape at first glance. The Sphere has the purple swirl; the cables do not.
- If you drift too far right, you'll snag on the shutter doors and waste line. Stay in the left half of the chamber.
- The Sphere does not respawn on a snapped line. If your run ends before you pick it up, you can come back; if it ends after, the Sphere is banked for the save.
⌕ Common Questions
Can I get all three Point Nemo artifacts in one descent?
I missed the Sphere — does the chamber reset?
Is there anything to scale here?
★ What you get
- Completion
- Counts toward the Point Nemo 100% Secrets achievement.
- Endgame impact
- Combined with the Sextant and Toy Submarine, the game unlocks the full Stage 4 ending sequence.
- Sells for
- Loaded Support Sphere cannot be sold. Artifacts exist for lore and 100% completion only.
✎ What Players Are Asking
Real questions from Steam Community discussions, archived as they appeared.
“Last Artifact (Point Nemo)”
Why this matters: Steam posters consistently get stuck on the third Point Nemo artifact (Toy Submarine), not this one. The Sphere is usually picked up by accident on the first descent — which means it doesn't generate forum questions, but every Point Nemo guide reader is looking for the other two.
⌬ Related Secrets
Why a battered orbital sphere sits beneath Point Nemo
Point Nemo isn't just remote — it's the South Pacific spacecraft cemetery. Space agencies deliberately steer decommissioned satellites and old cargo vehicles toward this stretch of ocean because, with 1,670 nautical miles between you and the nearest land, there's almost no risk a stray fragment will hit anything. Hundreds of pieces of pressure spheres, fuel tanks, and structural shells have been ditched here since the 1970s. The Loaded Support Sphere is the game's nod to that real scrap layer: a load-bearing pressure vessel that did its job in orbit, then got dumped where no one would have to look at it again — until you fished it out.